This tutorial will provide the data that we will use when training our Generative Adversarial Networks. It will also take an overview on the structure of the necessary code for creating a GAN and provide some skeleton code which we can work on in the next post. If you’re not up to speed on GANs, please do read the brief introduction in Part 1 of this series on Generative Adversarial Networks.
Introduction
We’ve looked at how a GAN works and how it is trained, but how do we implement this in Python? There are several stages to this task:
- Create some initial functions that will read in our training data
- Create some functions that will perform the steps in the CNN
- Write a
classthat will hold our GAN and all of its important methods - Put these together in a script that we can run to train the GAN
The way I’d like to go through this process (in the next post) is by taking the network piece by piece as it would be called by the program. I think this is important to help to understand the flow of the data through the network. The code that I’ve used for the basis of these tutorials is from carpedm20’s DCGAN-tensorflow repository, with a lot of influence from other sources including this blog from B. Amos. I’m hoping that by putting this together in several posts, and fleshing out the code, it will become clearer.
Skeleton Code
We will structure our code into 4 separate .py files. Each file represents one of the 4 stages set out above:
gantut_imgfuncs.py: holds the image-related functionsgantut_datafuncs.py: contains the data-related functionsgantut_gan.py: is where we define the GANclassgantut_trainer.py: is the script that we will call in order to train the GAN
For our project, let’s use the working directory ~/GAN. Download these skeletons using the links above into `~/GAN’.
If you look through each of these files, you will see that they contain only a comment for each function/class and the line defining each function/method. Each of these will have to be completed when we go through the next couple of posts. In the remainder of this post, we will take a look at the dataset that we will be using and prepare the images.
Dataset
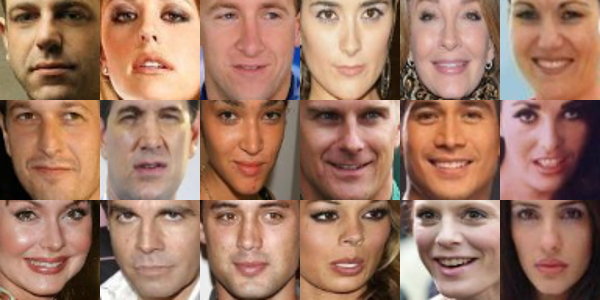
We clearly need to have some training data to hand to be able to make this work. Several posts have used databases of faces or even the MNIST digit-classification dataset. In our tutorial, we will be using faces - I find this very interesting as it allows the computer to create photo-realistic images of people that don’t actually exist!
To get the dataset prepared we need to download it, and then pre-process the images so that they will be small enough to use in our GAN.
Download
We are going to use the CelebA databse. Here is a direct link to the GoogleDrive which stores the data: https://drive.google.com/drive/folders/0B7EVK8r0v71pTUZsaXdaSnZBZzg. You will want to go to the “img” folder and download the “img_align_celeba.zip” file. Direct download link should be:
Download and extract this folder into ~/GAN/raw_images to find it contains 200,000+ examples of celebrity faces. Even though the .zip says ‘align’ in the name, we still need to resize the images and thus may need to realign them too.

Processing
To process this volume of images, we need an automated method for resizing and cropping. We will use OpenFace. Specifically, there’s a small tool we will want to use from this.
Open a terminal, navigate to or create your working directory (we’ll use ~/GAN and follow the instructions below to clone OpenFace and get the Python wrapping sorted:
cd ~/GAN
git clone https://github.com/cmusatyalab/openface.git openface
Cloning complete, move into the openface folder and install the requirements (handily they’re in requirements.txt, so do this:
cd ./openface
sudo pip install -r requirements.txt
Installation complete (make sure you use sudo to get the permissions to install). Next we want to install the models that we can use with Python:
./models/get-models.sh
This make take a short while. When this is done, you may want to update Scipy. This is because the requirements.txt wants a previous version to the most recent. Easily fixed:
sudo pip install --upgrade scipy
Now we have access to the Python tool that will do the aligning and cropping of our faces. This is an important step to ensure that all images going into the network are the same dimensions, but also so that the network can learn the faces well (there’s no point in having eyes at the bottom of an image, or a face that’s half out of the field of view).
In our working directory `~/GAN’, do the following:
./openface/util/align-dlib.py ./raw_images align innerEyesAndBottomLip ./aligned --size 64
This will align all of the innerEyesAndBottomLip of the images in ./raw_images, crop them to 64 x 64 and put them in ./aligned. This will take a long time (for 200,000+ images!).

That’s it! Now we will have a good training set to use with our network. We also have the skeletons that we can build up to form our GAN. Our next post will look at the functions that will read-in the images for use with the GAN and begin to work on the GAN class.


